The RIGHT Way to Configure Google Drive


Dropbox has long been the gold standard for how file syncing should work (and you can check out our Dropbox buyer’s guide to learn more). However, since Google Drive launched, and comes with 30GB free with Google Apps accounts, it’s been steadily replacing many companies’ file sharing platforms. The problem though, is that Google Drive’s default organizational framework is confusing and broken. Read on to learn the best way to configure Google Drive for your organization.
The default configuration is for new files to be created in an individual users “My Drive”, not shared with anyone. Then they will share that individual file with select people, who then have these files in a mixed “stream” of Shared files (in their “Shared with Me” tab), and suddenly the organization’s core files are complete chaos.

Creating a random file in Google Drive dumps it to the users personal area and is NOT shared.
Google Drive Salvation
With a little bit of organization and business process optimization, you can configure Google Drive to work for you.
1. Decide and create the folder structure you want
An admin or the business owner should first create the folder structure you want, e.g. by department or other natural organization. In the image above, we’ve got Clients, Design, General product, Sales and Marketing. When you create a new folder, it’ll appear in your own “Drive”, and you can share it from there.

Example creating a New Folder to be shared, starting in your My Drive
2. Share each folder with the people you want
For each individual folder, you’ll want to share it with everyone that will need access to the files in that particular folder. Typically this will be departments, plus managers or admins, though you can also use this for specific projects. Just select the add person button top share it, then enter the emails of anyone you want to invite.

Sharing a new Folder.

Choose who you want to share the folder with.
3. Have each person “Add to Drive” to each of those shared folders
This is important – after you share the folder, the recipient will see it first in their “Shared with me” area. They will have to click the “Add to My Drive” button in red below. If you don’t do this, it’ll continue to appear in their Shared with Me, and won’t sync to their desktop (more on that below).

You’ll know it’s done right when you see that shared folder in their “My Drive” section:

4. Train everyone to ONLY create files from WITHIN a shared folders

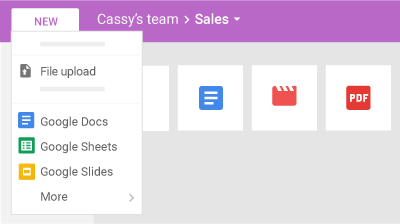
Files should only be created from within the shared drive. You’ll know you’re in there when the header says My Drive > Folder name. Then click the New button, and the type of document, and it’ll AUTOMATICALLY be shared with everyone who has access to that folder. Happiness ensues.
5. Bonus usage – Install Google Drive on your Desktop
Installing Google Drive for your Mac or PC will sync all of the folders added to “My Drive” to your desktop or laptop, for offline access. Offline access doesn’t work for Google Docs, Sheets, or Slides, those are just links and will open in a browser, but other files (e.g. Office files, etc.) will open just fine.

Click “Download Drive” from within Google Drive

Install on your Mac (or PC)

Sign into your Google Account

View folder synced natively to your desktop or laptop.
6. Enjoy file sharing nirvana!
With this setup and user training, your entire organization will be on the same page and into file sharing nirvana.
This post was originally published in June 2016, and updated in November 2017 with an update to Google’s new Team Drives product.
See Vendr's Google Workspace Buyer's Guide for more info on pricing and plans.

 Dropbox
 Google
 Microsoft


